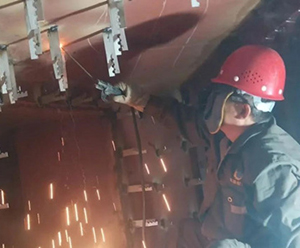
Castable construction focuses on several links such as pin welding, bitumen painting, water mixing, mold fixing, vibrating, mold release protection, size assurance, and accuracy of measuring points, and the implementation is carried out in strict accordance with the requirements of the material manufacturer and the boiler factory.
1. Pin and grab nail installation
Before the water pressure, the pins in the relevant areas such as the welding joints of the heating surface and the combined welding joints and the joints of the heating surface during the transportation and installation process should be filled up. Repair welding and grab nails to ensure that the pins are arranged according to the designed density. Before pouring, apply a layer of asphalt paint with a thickness of> 1mm on all embedded metal parts, nails and other metal surfaces or wrap combustible materials.

2. Ingredients, water distribution, mixing control
The ingredients are weighed and the water is distributed in strict accordance with the requirements of the material manual of the material manufacturer, and a designated person is responsible for the accurate measurement. The water used for mixing castables must be clean water (such as drinking water), with a pH of 6~8. Pay attention to the order of adding water and the mixing and mixing time. It is not allowed to add water at will, and it is not allowed to advance or extend the mixing time arbitrarily. The amount of water must not be added to one place, and the castable must be fully mixed. It is necessary to add steel fiber to the castable during the process of adding water and mixing, and shall not be mixed in agglomerates.
3.Template control
Castable mold making is a very critical process, and the quality of the mold plate directly affects the quality of the castable. The template control focuses on the acceptance of its firmness and dimensional accuracy. The template must be firm and tightly assembled to ensure that there is no displacement or looseness during pouring. The wooden mold should be laid out according to the geometric dimensions of the construction drawing and the pouring thickness, prefabricated and assembled, and the interface is tight. The mold is made with a 15 cm template and a wooden square, with a width of ≤500mm; the special-shaped mold is made of a wooden square and covered with a surface Layered three-centimetre board, the surface is brushed with two release agents to ensure the thickness of the castable and the surface after construction is smooth and clean without pitting. The formwork must be checked and accepted before construction.
4.Pouring control
When pouring the castable, the height of each feed is controlled in the range of 200~300mm, the part with thickness greater than 50mm is poured with an inserted vibrator vibrating, and the “fast in and slow out” method is used to vibrate continuously during vibrating to prevent retention For the lower hole and leakage vibration, the vibration time of each point should not be too long to prevent the fine powder from floating. During the vibration process, the vibrating rod must not hit the template and hook nails too much. When pouring castables greater than 50mm thick, the area greater than 10m2 should be constructed at two points at the same time; to ensure that the mixed materials are poured within the specified time, the pouring of the parts less than 50mm thick is preferred to be self-leveling and automatic Degassed self-flowing castable construction.
5.Reservation of expansion joints
Because the expansion coefficient of the castable is inconsistent with the expansion coefficient of the steel, it is about half of that of the steel. In general, there are four ways to solve the expansion of the castable: one is to paint the asphalt paint on the pin and metal surface, the thickness is not less than 1mm. The second is the large-area pouring part, which is poured in blocks every 800~1000×400, and the expansion joint material is pasted from the side to leave the expansion joint. The third is to wind ceramic fiber paper with a thickness of 2mm on the surface of the hood, instrument pipe fittings, and metal wall penetration parts as expansion joints. Fourth, a knife can be used to cut out a half-thickness gap during construction of the plastic, or a hole can be punched in the plastic to solve the problem of expansion.
Post time: Oct-22-2021
